As usual with the Designer Stitch patterns,
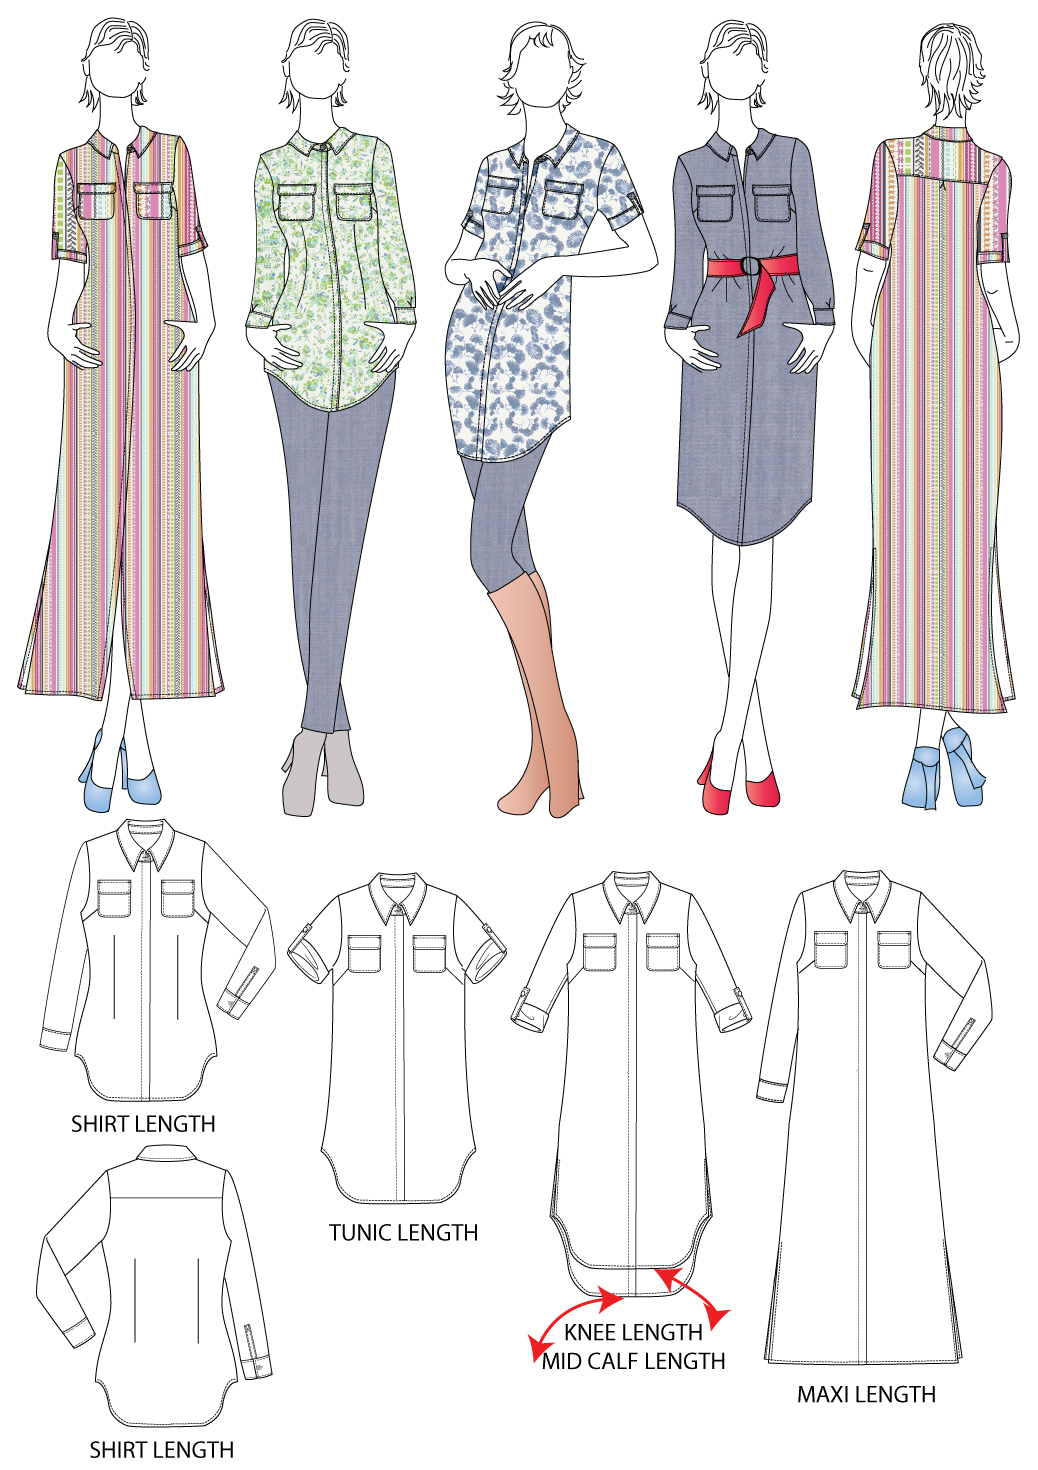
the Sedona pattern is full of options. It has all the classic shirt details, like a back yoke, collar with a stand, sleeves with the classic placket and cuff, 3/4 sleeve and short sleeve. Also, there are 5 options for the length and with the exception of the maxi length, the other lengths have a shaped hem. For a more fitted look there are fisheye darts on the pattern and in the back you have the option for a pleat, not to be used in combination with the waist darts. Also, there are optional front patch pockets and inseam pockets for the dress options. And one of the main features of this design is the concealed button placket.
But, one of the most important features is that
the Sedona comes with cups sizing, that makes it so easy to fit! The sizes are (US) 2-22 (EU) 34-54 (UK )6-26
I made my dress in size 3 cup C and I made my standard adjustments: narrow shoulders adjustment, lifted the dart point by 1cm and I wanted the armhole a bit higher at the underarm so I adjusted the sleeve head accordingly to make it fit in my new armhole.
As you can see in these pictures I made 3 versions of this pattern, actually 4, a maxi version in challis from Minerva Crafts, but that one it will be blogged on the Minerva blog, and that is definitely a favorite! I will post a link when it will get live.
The first version of
the Sedona was this knee-length dree made in beautiful cotton, black with white polka dots weaved in the fabric.
The weight of the fabric and drape were perfect for this dress! I omitted the back pleat and the waist darts. I love the fit over the bust and shoulders, I think is perfect!
The next versions I made, and I sewn these two at the same time, was a tunic length in the blue/white poly/cotton blend and a shirt version in a stretch crepe.
Because the crepe has a softer drape I did add the back pleat here! Also in these two versions, I omitted the waist darts, I like the loose fit, not too boxy.
To finish the bottom edge, instead of turning the hem and stitch I use bias tape and bound the hem, I think is a nice detail.
I love the sleeves with the placket and cuff, as you can see I used these in all my versions! I can sew one in no time now, after all these :)).
For the dress, I also made a belt from the fashion fabric. I am very satisfied with this pattern and I think with a few small changes I can get a lot of different looks.
Here are a few inspiration pictures from my Pinterest board, that I really want to try!
 |
| source:pinterest |
 |
| source :Pinteres |
 |
| source:Pinterest |
...and a few details :)
And the action video is here on
YouTube
Happy Sewing!
**This post contains affiliate links
Disclaimer: Please be aware that this blog post contains affiliate links and any purchases made through such links will result in a small commission for me (at no extra cost for you).