Search

Showing posts with label designer stitch. Show all posts

Sunday, February 20, 2022

Bella set from Designer Stitch plus sewing tututorials

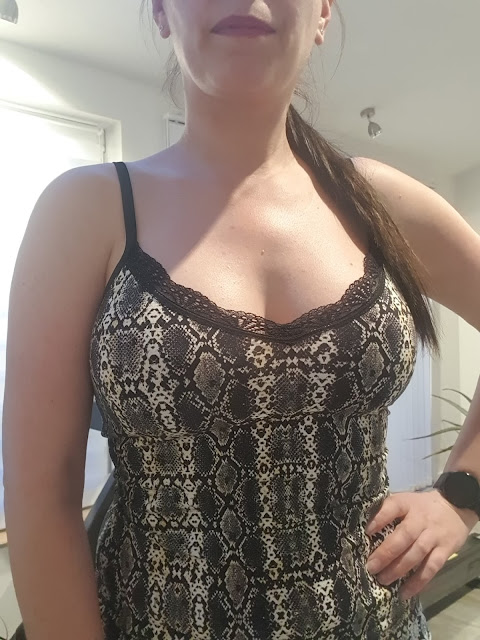
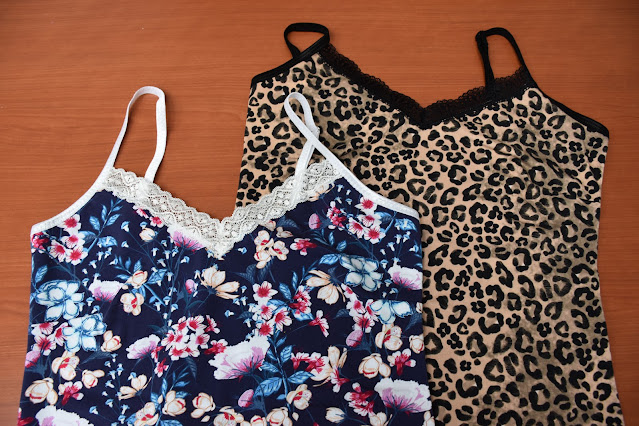
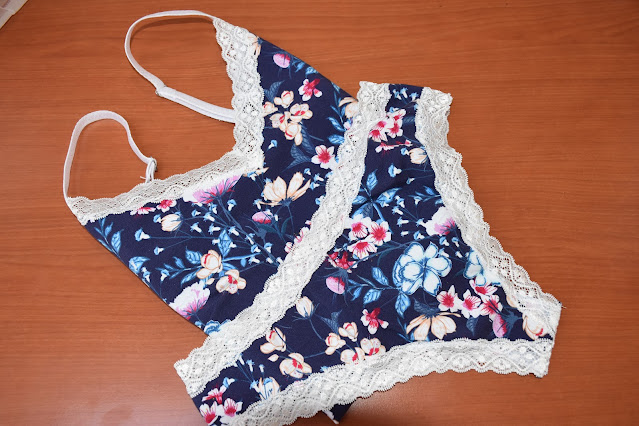
 Designer Stitch has a new pattern, actually, there are 5 patterns packed in one set! The Bella set includes a camisole and four styles of briefs. These are the perfect patterns to step into making your own lingerie/undergarments.


The pattern is designed for cotton jersey and is perfect for small pieces of jersey, I always keep those, and I never could decide what to make with them :)  The edges of the briefs and the front edge of the camisole are finished with stretch lace trim and the shoulder bands of the camisole are made with fold-over elastic.

Link to the Designer Stitch Shop

https://designerstitch.com/shop/bella-cami-briefs/

The cotton jersey used for all these is from Driessenstoffen, from their #byLisan collection, a 200 gr/m² type of cotton jersey, I think this is the perfect weight for this garment.

For the camisole there are cups sizes included, which makes it very easy to get the perfect size. 


It is easily addictive to make this set. I have already a bunch of these camisoles and a few different styles of briefs.

I made a series of 5 videos on my Youtube channel including a tutorial for the camisole and one for sewing the gee/Brazilian style bottom.

Look for the timestamps in the videos description or the chapters at the bottom of the video page...there you can choose to skip to different parts of the videos.


In my intro video you can see me wearing one of my Bella camisoles and I am showing you a few options for fabric and also very briefly how I made the swayback adjustment. Also a few tips on how to choose the size you need to make.

https://www.youtube.com/watch?v=cohHLxvfEtQ&t=1s

Episode 1 is about marking and sewing the darts. I am showing my way of marking the dart, really easy and finishing at the dart points.
Episode 2 is about  preparing the lace to get a perfect motief at the center front  and sewing it with the sewing machine or with the coverstitch machine

Episode 3 is about sewing the fold over elastic ( with the sewing machine or coverstitch machine) and making the shoulder bands

The latest tutorial on the Bella set is a full tutorial on sewing the thong-style bottom.
I show how to apply the lace edging, sew the crotch lining and finish the side seam.
https://www.youtube.com/watch?v=8r9zVSCpWhI

I love this set, I love wearing the camisoles and the bottoms, so comfortable and beautiful, easy to make, and oh so pretty!

Happy sewing! xx


Sunday, May 5, 2019

Sewing pattern review Scuba Taylor Dress from @designerstitch


A new video review is on my YouTube channel, I am talking about the Taylor dress pattern and about the two versions I made. This is a great pattern, made for knit fabrics and offering cup sizing for an easy fit. 
At the end of the video, there is also a modeling video where you can see how nice those flounces are moving:)


Aff link to the pattern  

http://bit.ly/2ZC6QzK

Happy sewing!

Thursday, January 31, 2019

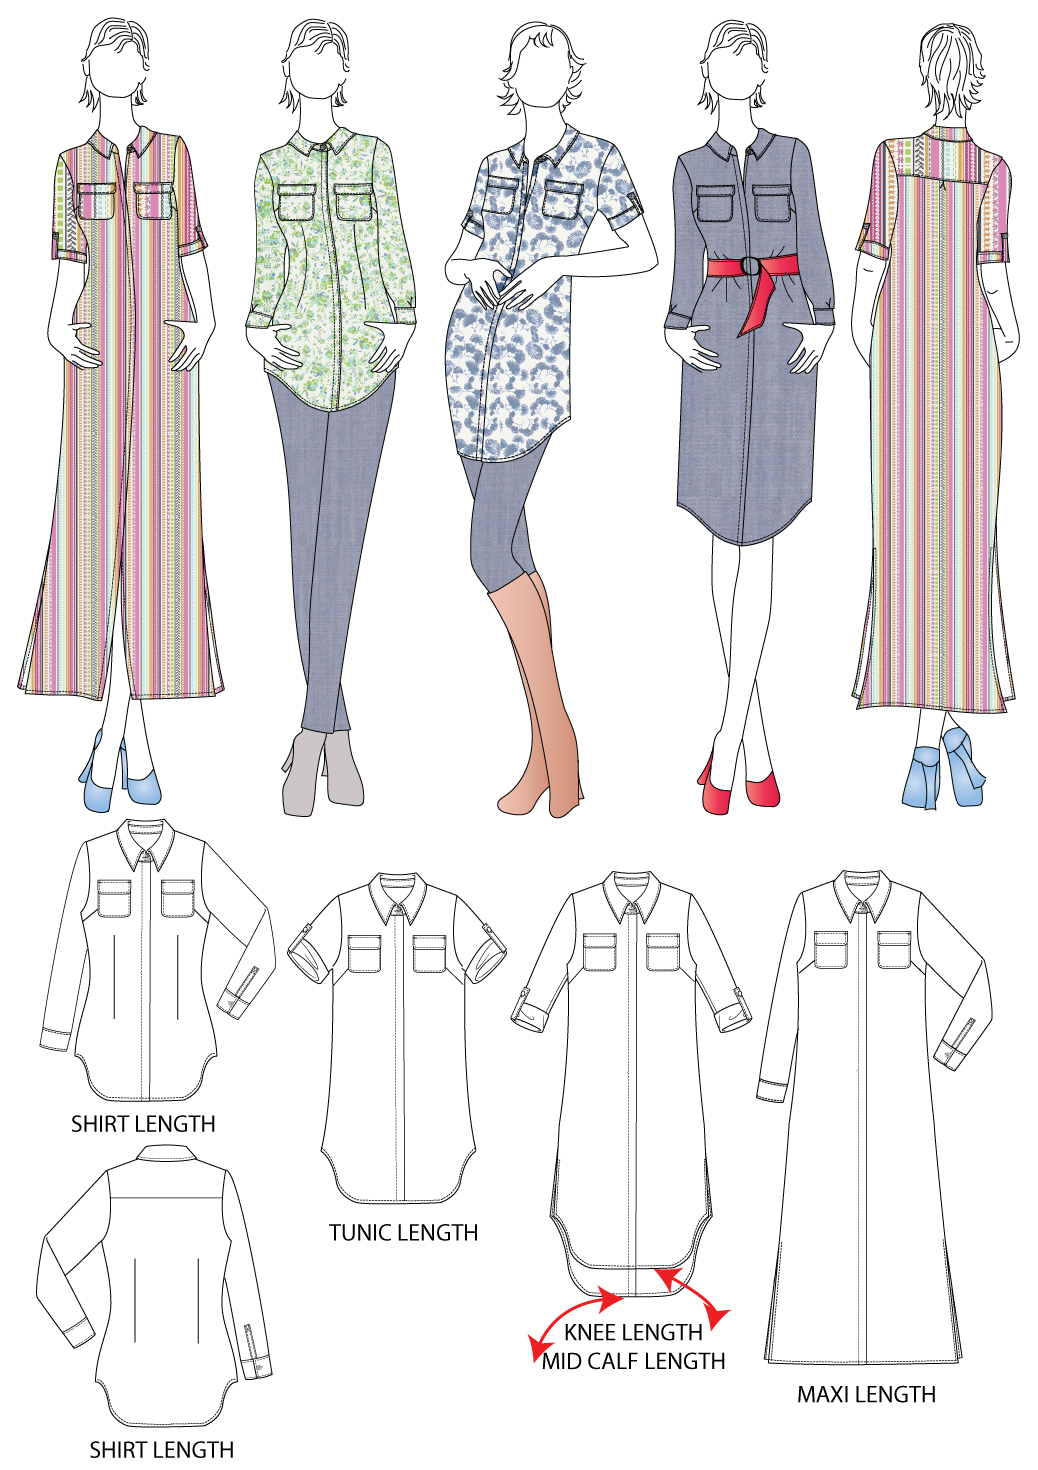
Sedona 3 times :shirt, tunic and dress , pattern by Designer Stitch


I am a bit late to the Sedona party but here I am with my review on the latest pattern from Designer Sitch, the Sedona shirt/tunic/dress sewing pattern.


As usual with the Designer Stitch patterns, the Sedona pattern is full of options. It has all the classic shirt details, like a back yoke, collar with a stand, sleeves with the classic placket and cuff, 3/4 sleeve and short sleeve. Also, there are 5 options for the length and with the exception of the maxi length, the other lengths have a shaped hem. For a more fitted look there are fisheye darts on the pattern and in the back you have the option for a pleat, not to be used in combination with the waist darts. Also, there are optional front patch pockets and inseam pockets for the dress options.  And one of the main features of this design is the concealed button placket.


But, one of the most important features is that the Sedona comes with cups sizing, that makes it so easy to fit!  The sizes are (US) 2-22 (EU) 34-54 (UK )6-26

I made my dress in size 3 cup C and I made my standard adjustments: narrow shoulders adjustment, lifted the dart point by 1cm  and I wanted the armhole a bit higher at the underarm so I adjusted the sleeve head accordingly to make it fit in my new armhole. 


As you can see in these pictures I made 3 versions of this pattern, actually 4, a maxi version in challis from Minerva Crafts, but that one it will be blogged on the Minerva blog, and that is definitely a favorite! I will post a link when it will get live.


The first version of the Sedona was this knee-length dree made in beautiful cotton, black with white polka dots weaved in the fabric.

 The weight of the fabric and drape were perfect for this dress! I omitted the back pleat and the waist darts. I love the fit over the bust and shoulders, I think is perfect! 

If you are intimidated by the concealed button placket, in the instructions you will find a small template that you can use to practice the folds, very handy. Also on the Designer Stitch blog is a blog post on how to change the concealed closure to a standard button stand.


The next versions I made, and I sewn these two at the same time, was a tunic length in the blue/white poly/cotton blend and a shirt version in a stretch crepe. 
Because the crepe has a softer drape I did add the back pleat here! Also in these two versions, I omitted the waist darts, I like the loose fit, not too boxy. 


To finish the bottom edge, instead of turning the hem and stitch I use bias tape and bound the hem, I think is a nice detail. 


I love the sleeves with the placket and cuff, as you can see I used these in all my versions! I can sew one in no time now, after all these :)).


For the dress, I also made a belt from the fashion fabric. I am very satisfied with this pattern and I think with a few small changes I can get a lot of different looks. 


Here are a few inspiration pictures from my Pinterest board, that I really want to try! 
source:pinterest

source :Pinteres

source:Pinterest

...and a few details :)


And the action video is here on YouTube 
The Sedona shirt/tunic/dress pattern is available at the Designer Stitch shop here ( aff link) 

Happy Sewing!

**This post contains affiliate links
Disclaimer: Please be aware that this blog post contains affiliate links and any purchases made through such links will result in a small commission for me (at no extra cost for you).

Thursday, November 15, 2018

Harper pants-Designer Stitch pattern


As much as I like dresses and skirts, pants are always easy, and comfortable pants are even better. Making my own gives me the chance to make them comfortable, even if I am making jeans. 
In this case, I made no jeans but Super Comfortable ponte knit  pants. The Harper pants from Designer Stitch.


The Harper Pants pattern offers a number of styling options.
– Standard Leg with optional front pin tuck.
– Faux side front pockets.
– Jeans style functional pockets.

All of the above styles are completed with
– an elastic waistband
– faux stitch fly.
– faux back welt pockets
– a choice of straight leg or slim leg widths and optional belt loops.


I made size 2 . I lowered the front rise by 2cm and the back rise by 3.5cm. Here, on the Designer Stitch blog is a post about the right way to adjust the rise of your pants. The stretch of your fabric is the key in this pattern. 
From de pattern description :

Heavyweight Ponte De Roma fabrics are BEST for the Harper Pants with at least 40%
4-way stretch.  Approx fibre content of: 70% rayon, 25% nylon, 5% Elastane
or 70% Polyester, 25% Rayon, 5% Elastane
(Heavy Weight Fabric minimum 340 gsm (10 – 12 ozs)


I made my muslin in a much softer fabric with lesser vertical stretch not thinking further that my final fabric will have much more vertical stretch... I could have shortened the pattern a bit more to get the waist a bit lower but I had only 1.5m from this black ponte so I could not make my test garment out of the same fabric. I think is very important to use for your test garment, fabric with the same stretch percentage as your final fabric.


I made the slim leg and the faux slant pockets. In the back are two faux welt pockets. The instructions on these are perfect, it went very easy( on the Designer Stitch blog there is also a tutorial with pictures for this). Also, I shortened the pants by 5cm.


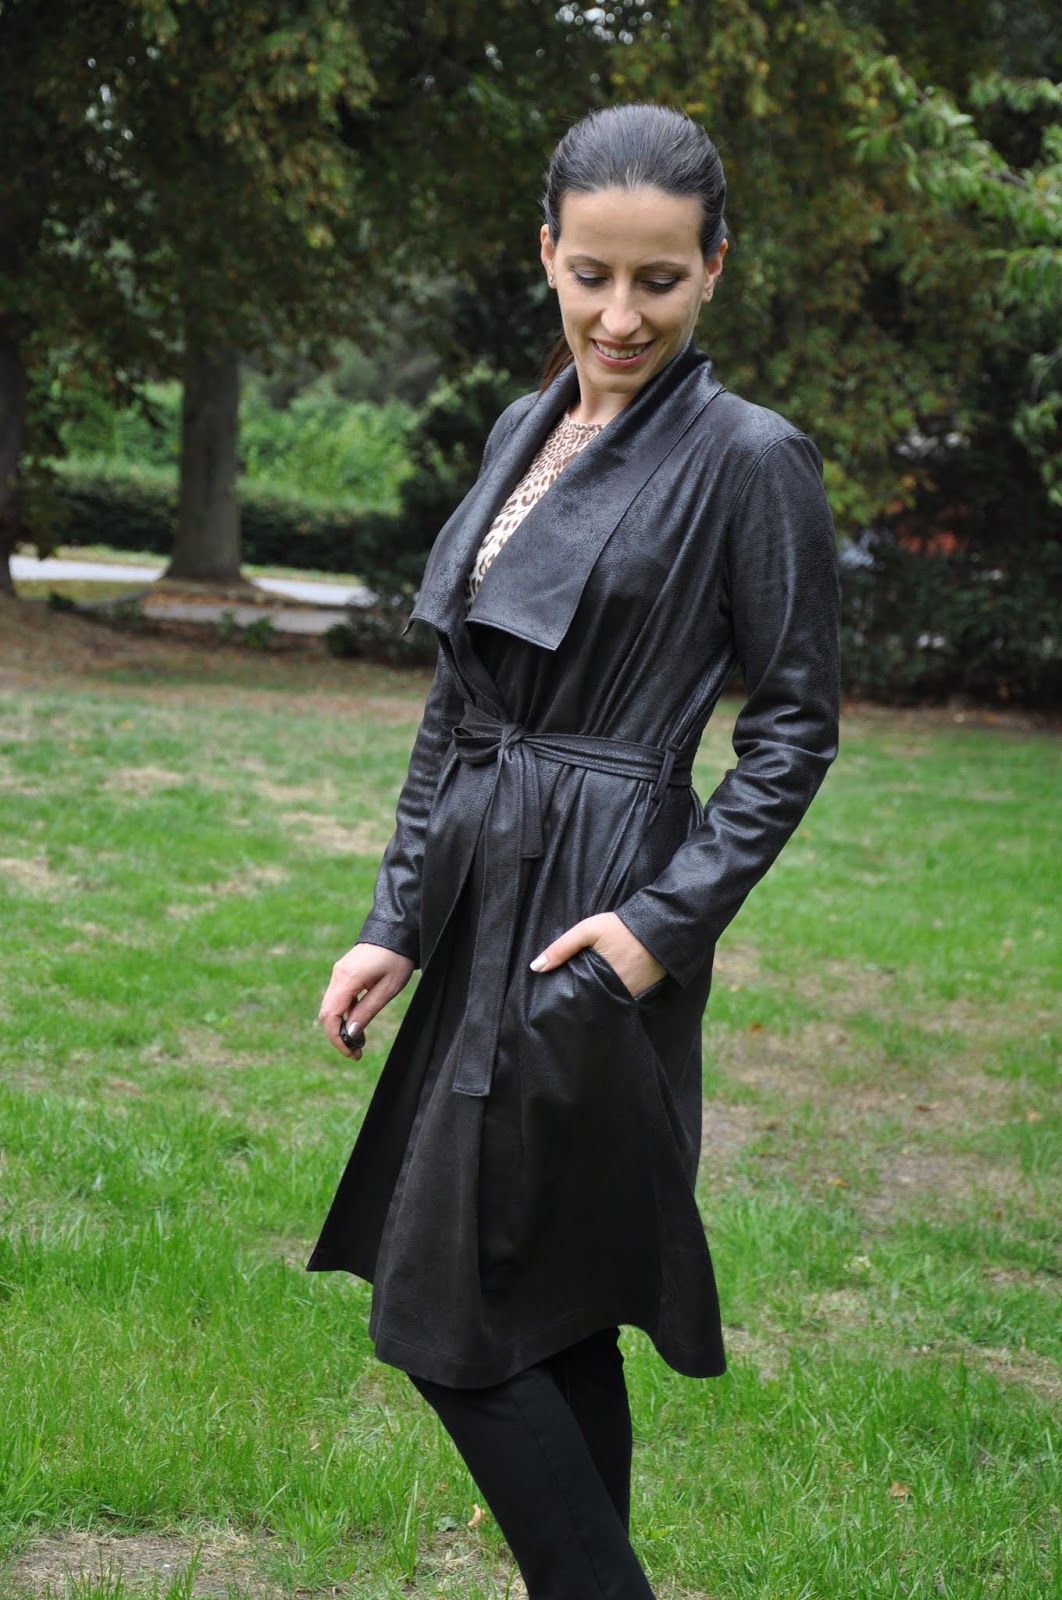
I would not wear my blouse tucked in:)) but this was better than pulling my blouse up to show the details  :)). The top in this pictures is another Designer Stitch pattern, one of my all-time favorites, the Bridget blouse, 


I love how these pants are looking like tailored pants but having the comfort of yoga pants. The pattern is for a limited time on sale.
Link to the shop here ( aff.link) 


**This post contains affiliate links
Disclaimer: In the name of full transparency, please be aware that this blog post contains affiliate links and any purchases made through such links will result in a small commission for me (at no extra cost for you).

Monday, September 17, 2018

Chelsea cardigan by Designer Stitch

Chelsea cardigan in sweater knit 
The fall is here and I am in great need of appropriate clothes for cooler days. So, the new pattern from Designer Stitch came at the perfect time, the Chelsea Cardigan. I tested the pattern but I can assure you that the opinions are 100 percent honest. I made 3 of them so I wouldn`t waste my time and fabric on a pattern I don`t love. 
I made a full video review on YouTube with action videos too and the sewing tutorial on how to attach the collar is here


The Chelsea Cardigan is coming with three length options, pockets, and an optional belt. I made mine in the longer length but I definitely want to make it also in the shorter version. I made a size 3 with a swayback adjustment ( my typical adjustment)  and  I also made the pockets a bit deeper.


This version is made in a sweater knit from Driessenstoffen.nl , with a nice stretch and great drape, perfect for this pattern. To stabilize the shoulders I added clear elastic on the back shoulders and for the back neck I added seam tape to avoid stretching, it worked perfectly.


This one is made in ponti knit, and also here I used the stay tape to stabilize the back neck and the shoulders. Also, a good idea is to staystitch the pocket bags. I explain that also in the video (https://youtu.be/IeBlA9Nn3w4?t=16m8s). That makes the pockets to stay in place and not roll out.


The back is cut on the fold. I love the slightly A shape.

This version was made in a faux suede ( also from Driessenstoffen ) and to be honest I did not even think on how I am going to sew it ... Cutting was easy with my rotary cutter but when I tried to put a pin on it was almost impossible. 
So my tips on sewing with this fabric are: use wonder clips or paper clips to hold your pieces together, use a microtex needle, for me a 60/8 needle was the perfect one; don`t press directly on the fabric, use a pressing cloth, I use a piece of  silk organza which is also seethrough, use a slightly longer stitch length ( I used a 3), a walking foot can be very useful, I kept the IDT on my Pfaff engaged all the time. 

I wanted to topstitch my seams and decided also to leave the edges unfinished, this fabric is really like leather, it doesn`t reavel at all and if it is nice cut it really doesn`t need any finishing. The pattern has 6mm seam allowance, something to keep in mind. To finish the pockets edges, I used my pinking shears.

The instructions are to finish the collar by hand but because I did not want to fight with this fabric to get my needle in it ( I also did not have one so thin in the house, and going to the fabric store for a needle, or even order it online it would have great risks of  buying more fabric :))) So, I  thought on using the bagged method ( or also known as burrito method ) as you will use it on a shirt collar or a cuff . That worked PERFECT! I stitched till the shoulder seams and for the rest of the collar at the back I just fold the SA in, and topstitched Here above you can see how it looks from the inside. Very neat and super fast.

I love this version, it looks more like a coat but you know, much faster to make:). This fabric so soft!


Soon there will be a sew along at the Designer Stitch blog and I am going to make a video on the bagged method for the collar. So if you think that you don`t want the pattern because you need to hand stitch the collar, no worries the bagged method is super easy and super fast. I used it also on the black/purple ponti version and it worked perfectly.

...and here are the three garments in action :)


The Chelsea Cardigan is for a limited time in the sale 

Link to the Designer Stitch webshop https://bit.ly/2OyTIpm

Happy sewing!

**This post contains affiliate links
Disclaimer: In the name of full transparency, please be aware that this blog post contains affiliate links and any purchases made through such links will result in a small commission for me (at no extra cost for you). 


Sunday, June 24, 2018

Carmen skirt and new YouTube videos!


I feel like this month was the skirt month for me, I made three and I have at least two planned. 
Today I want to talk about the latest pattern from Designer Stitch Patterns , the Carmen Skirt.
The description on the Designer Stitch website is perfect :

 The Carmen is all about being SASSY, FLIRTY and SEXY !!!

The length of the Carmen gives you the opportunity to wear it for all seasons – Short and Flirty for the warmer months and Long and Flouncy for the cooler months.


The styling of the Carmen gives the impression of a wrap skirt – but with the clever front seam construction it retains its modesty and stays fully closed at the front.

When I took the pictures it was really windy outside, not the perfect weather for pictures but perfect to illustrate how windproof this is.


I made my skirt in a cotton sateen with a bit of stretch. Because the wrong side of the fabric is showing on the flounce  I searched for a fabric with two nice sides but could not find anything I liked in my stash. I did find a piece of cotton eyelet and decided to face my flounce.


Long story short, if you want to do this, you need to remember to cut mirror images of your flounce pieces. I forgot that and ruined a big piece of my eyelet. I think this is a great idea, you also finish the edge of the flounce, so no hemming and it gives also a bit body and structure on the flounce.


The pattern, while it looks a bit complicated it is really easy, for some people, the most challenging part it might be the invisible zipper on the back, but the instructions are included.


The patterns come with 3 waist options and two length options. I think it will be great made in a drapey wool and worn with boots for the fall/winter time.


I did a little video review also on YouTube!


...and here is the "action" video!

I love this pattern and I am definitely going to make the longer option too.

The pattern is for a few days on sale . 


**This post contains affiliate links
Disclaimer: In the name of full transparency, please be aware that this blog post contains affiliate links and any purchases made through such links will result in a small commission for me (at no extra cost for you). 


Sunday, May 6, 2018

Eden cold shoulder Jumpsuit-Designer Stitch Pattern


I love wearing jumpsuits, in one step ready to go! I made a few and I still wear them a lot.
So a new jumpsuit pattern from Designer Stitch means a new jumpsuit for me. This is the Eden Jumpsuit! 
The pattern has options for short ( playsuit) leg or long leg, sleeveless or cold shoulder sleeve or you can even make only the pants. As usual, the pattern has cup sizing.  


I made the longer leg version with the cold shoulder. I started with size 3C and made a muslin. Based on the fit of my muslin I changed the pattern to size 2 for the shoulders/neck area and kept size 3 for the bust /waist/hips. Also did my usual swayback adjustment of 1.5cm. The jumpsuit closes with an invisible zipper at the back and it also has elastic in the waist. I sewed the zipper only on the bodice area. The waist with the elastic is wide enough to pull the pants up without having an opening at the back of the pants .


The fabric is rayon with small paisley motifs. I think this fabric is perfect for this pattern, great drape, I love it.
To give a better impression on how great this fabric is for this pattern, I made a small video. I think that is great to see how the garment "moves"


I am very happy with this jumpsuit and I have at least two fabrics that I want to transform in Eden jumpsuits. 
The pattern is just released and now for a limited time on sale at the Designer Stitch Patterns shop.


*This post contains affiliate links


Sunday, February 4, 2018

Synthia top-Designer Stitch pattern


I know, another Designer Stitch pattern, but with the little sewing time, I have, making patterns that I know the fit of is the best choice to have a little sewing pleasure. This is the latest DS pattern, the Synthia Top, semi-fitted, made for wovens, with cup sizes ( I love that! )  and it comes with two options, as a plain sleeveless top or with the ruffled collar and armhole frill.


I made a size 3 cup C and made two adjustments, I raised the dart point by 1.5cm and made a swayback adjustment ( 2cm). I love the fit over the bust and this might be my "to go pattern" in de future for a woven top. 


I did not have the time to find fabric with two good sides but this poly crepe is ok. I love the drape of the fabric and weight only, as you can see in the pictures, it does have a clear wrong ( back ) side, it could have been worse though :)). So I think that an important point, when making the version with the ruffle, is to choose the fabric well, knowing that the wrong side will show.
The most consuming part is hemming the ruffle, but other than that it is a pretty fast make. Also, I did not add a zipper on the back. I can easily slip it over my head. 


Putting the ruffle together is like magic... the instructions will tell you how don`t overthink it, I did it, but actually, it is so so easy and actually very clear in the instructions. Also, because I was lazy and didn`t want to use the serger  ( although I think it would have bee faster:) ) I used french seams on all my seams. It does look very pretty on the inside.

I am wearing my Synthia top with the Liana jeans from Itch to Stitch. I love that pattern, I made it two times and I wear both pairs a lot, I need more of them in my wardrobe!


So, another successful project. I am definitely going to make more of this and I am sure I am going to enjoy wearing it when the weather warms up. 
The Synthia top is on sale for a limited time. 


*This post contains affiliate links