Search

Showing posts with label knits. Show all posts

Sunday, February 20, 2022

Bella set from Designer Stitch plus sewing tututorials

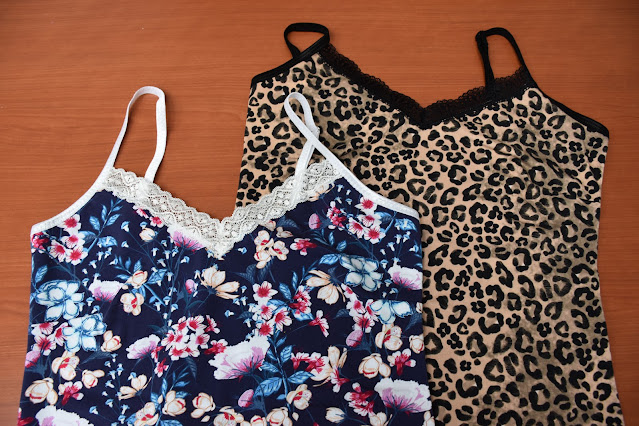
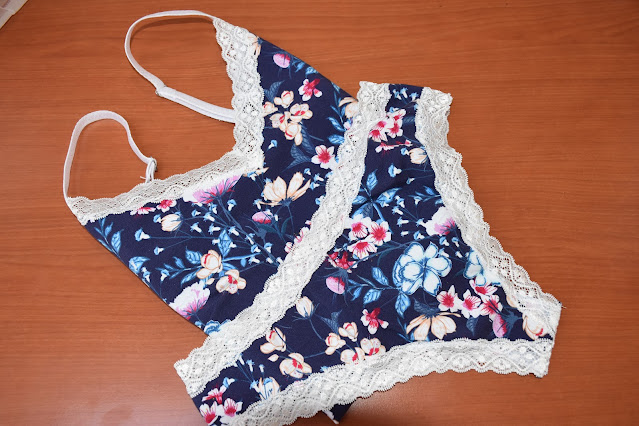
 Designer Stitch has a new pattern, actually, there are 5 patterns packed in one set! The Bella set includes a camisole and four styles of briefs. These are the perfect patterns to step into making your own lingerie/undergarments.


The pattern is designed for cotton jersey and is perfect for small pieces of jersey, I always keep those, and I never could decide what to make with them :)  The edges of the briefs and the front edge of the camisole are finished with stretch lace trim and the shoulder bands of the camisole are made with fold-over elastic.

Link to the Designer Stitch Shop

https://designerstitch.com/shop/bella-cami-briefs/

The cotton jersey used for all these is from Driessenstoffen, from their #byLisan collection, a 200 gr/m² type of cotton jersey, I think this is the perfect weight for this garment.

For the camisole there are cups sizes included, which makes it very easy to get the perfect size. 


It is easily addictive to make this set. I have already a bunch of these camisoles and a few different styles of briefs.

I made a series of 5 videos on my Youtube channel including a tutorial for the camisole and one for sewing the gee/Brazilian style bottom.

Look for the timestamps in the videos description or the chapters at the bottom of the video page...there you can choose to skip to different parts of the videos.


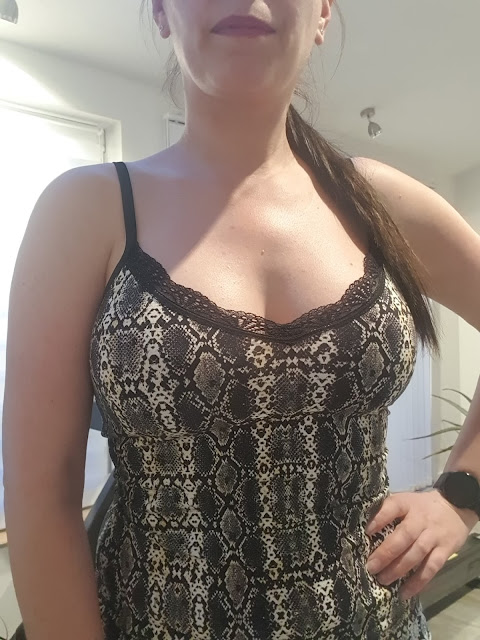
In my intro video you can see me wearing one of my Bella camisoles and I am showing you a few options for fabric and also very briefly how I made the swayback adjustment. Also a few tips on how to choose the size you need to make.

https://www.youtube.com/watch?v=cohHLxvfEtQ&t=1s

Episode 1 is about marking and sewing the darts. I am showing my way of marking the dart, really easy and finishing at the dart points.
Episode 2 is about  preparing the lace to get a perfect motief at the center front  and sewing it with the sewing machine or with the coverstitch machine

Episode 3 is about sewing the fold over elastic ( with the sewing machine or coverstitch machine) and making the shoulder bands

The latest tutorial on the Bella set is a full tutorial on sewing the thong-style bottom.
I show how to apply the lace edging, sew the crotch lining and finish the side seam.
https://www.youtube.com/watch?v=8r9zVSCpWhI

I love this set, I love wearing the camisoles and the bottoms, so comfortable and beautiful, easy to make, and oh so pretty!

Happy sewing! xx


Friday, January 11, 2019

KnipMode Magazine Dress #12 12/2018

I love to see patterns with special style lines, so those are always getting high on my "to sew"wishlist. That was also the case with this KnipMode Magazine dress from December issue 2018.
Lovely princess seams, front and back yokes and there is even an option for a small flounce  for the sleeves and a cuff.


I think this is a really cool pattern. They have it in the magazine in a few variations, like a top, as a dress with a bit fitted skirt, the one I used, or with a bit more flared skirt. The difference is in the side panel of the skirt, there are two extensions to make the side panel wider at the hem. Here you can see the tech drawing.

Picture from www.knipmode.nl
Picture from www.knipmode.nl 

A perfect pattern for color blocking, also in the magazine versions they used a sort of trim that it gets sewn in the seam. I think their dresses are much more fun than my grey one :)) but I know this is something I will get a lot of wear from.


I made a muslin for size 36 /38. It was way too fitted so I decided to make size 38 an keep 36 only for the shoulder length. For next time I need to remember that I should measure myself before I start on a new pattern. I did not do that for a while and it looks like I gained some cms around my waist and hips. Based on the test garment I also shortened the back length ( or swayback adjustment) and also took a bit off ( a total of 2cm) at the CB neck. I did not use a zipper as the fabric is stretchy enough. If I would use a zipper in a fabric like this   I would definitely interface the zipper area (actually I will do it in any fabric). 

For my test garment, I did not follow the instructions so I made a bit off a mess of the side point, where all the panels are coming together but it is actually so easy, following the instructions made it very easy, so well done KnipMode on that. This is the idea of it...as highlighted in this picture 


I also topstitched all my seams. I sewed the whole thing on the serger, topstitched with the sewing machine and made the hems on my cover stitch, which behaved very well on this fabric:). The fabric is a very thick knit fabric it does stretch a lot but I think a bit more stretch it would have been even better. For the next time, I need to give just a bit more extra room at the bust as you can see it is a bit tight and gaping there at the armhole, although is still feeling comfortable. ( I think here are again the few extra cms I gained and did not account for :)))


Adding clear elastic in the back shoulders.
To give a little support on my shoulders seam I added some clear elastic. I have the 6mm which is fitting perfectly in that hole of the standard presser foot from the serger. Without stretching I just let it feed as the serger is sewing the fabric. An alternative could be seam tape or woven selvage. 

Dress back
I kept the center back seam as I think it brakes a bit the back panel and it does have shaping in it.


Also, I used another method then instructed to finish the neckline. The instructions are telling you tu turn the SA to the inside and topstitch but I don`t really like that method so I cut a strip of my fabric a bit shorter than the neckline to ease that a bit into my strip and be sure it will lay flat. Sewed right sides together, trimmed the SA and turned to the inside and topstitched, I think it looks great!


The pattern is also as a PDF in their webshop and you actually get both dress options( and the top of course). Here is a link  ( no affiliate). Do remember that there is no seam allowance included!

....and that was all! Till next time, happy sewing! 


Tuesday, March 14, 2017

Newport top- Itch to stitch new pattern


I do sew other patterns than Itch to Stitch, but for this time, again a new PDF pattern from Itch to stitch. This is the Newport top, a pattern made for knit fabrics. It has a boxy silhouette, relaxed fit with high low hem. Wide boat neckline with envelope fold shoulders. The pattern comes with two sleeve options,3/4 flute and regular long. The size range is 00-20 and I made mine in size 6.


Depending on the fabric choice you will get a very different look. This blue version is made with jacquard jersey, very soft and with a nice drape. I made another version in a more stiff knit fabric and the difference is easy to see on the drape at the hem.

I think I like it more with the drapey fabric.


The neckline is finished with facings, that later are stitched in place, you can use for this decorative stitches, contrasting thread or a cover machine. I went with a regular stitch and matching thread as my fabric has the jacquard structure and I want it to keep it simple. The fabric is from a local fabric store "DroomStoffen" from Almere.


I really like the neckline of this top! This is a really easy to sew pattern, after attaching the facings with the regular sewing machine, I sew the rest on my serger in a few minutes. 

The Newport top is on sale at the Itch to Stitch pattern shop  


*this post contains affiliate links


Sunday, February 19, 2017

Hepburn Turtleneck - Itch to Stitch


First time I made the Hepburn Turtleneck  was in March last year, testing the pattern for Kennis from "Itch to Stitch".
I made then two of them and both are still quite often worn. I kept the pattern on sight to be sure I will not forget to make more. And now after almost one year I finally made two more Hepburns. 


I made size 6 blending to size 4 from the waist down. Further no changes . The fabric on both is a soft sweater knit. 


This is very fast sewn. I think that in one hour you are done, from cutting to wear it. That of course if you are not going to choose a striped fabric with all kind of different small stripes. The right side is almost perfect matched, the left side not so much, oh well...nothing to stress about ...hahaha.

Everything is sewn on the overlocker and the hems are done with the twin needle. Love a fast project with a very low failure percentage :). The fit is really nice, I think I could make a FBA on a next one. I love the fit on the shoulders, something that I need to adjust almost every time. 


I am not sure about this color on me, but this fabric is so lovely ,soft and perfect for this pattern.


Very happy with this two pieces. Next, I just finished two skirts, a pattern testing for Designer Stitch, the designer brand from the Bridget top. Next week is going to be released and I will blog then about them. On my table now is a dress   from Knipmode  2/2015, made a muslin and a few adjustments, but still not sure about it .We will see...


*this post contains affiliate links 

Tuesday, January 17, 2017

Paro Cardigan by Itch to stitch Patterns


Every time Kennis from Itch to Stitch has a tester call I am eager to apply. With this pattern was the same. This is the Paro cardigan, with all the nice elements I like in a cardigan: a slim waist, the nice pleats on the back, it is not tight but also not to loose and depending on the fabric choice I can make it really chic or just casual. I used to have an RTW one that I wore till I had to admit that the poor thing was ready to retire. You can imagine how much I like this new one as I made three during this week of testing.


I think the choice of fabric is very important when deciding to make this pattern. The recovery and the drape of the fabric will affect the end results. The one above is made in a knit with 25% horizontal stretch and I think 5 % vertical stretch.The waist is hanging way too low than the actual pattern. On this version I only made the sleeves 5cm shorter than the pattern.


This one is made out of a jersey with 20% horizontal stretch and no vertical stretch. The upper bodice is shortened by 1.5cm to get the waist at a higher point than the first version, shoulder seam shortened by 3cm ( personal preference as the pattern is designed with more relaxed shoulder line) and sleeves only 2cm shorter than the original pattern. I really like this version .


And this is the third one, made in a heavier knit, something like ponte but with a suede finish ( 20%horizontal stretch with almost none vertical), the pattern the same as I used for the second version. I love this fabric, very happy I have put it to good use.  

Love the back of this pattern! 
This is a really easy pattern. In 5 hours max., including printing and putting all together you will have a Paro ready to wear. 


I made it in size 6 for the upper bodice/bust and blending to size 4 for the waist and down.
The pattern is for a week on Sale for $8 on the Itch to stitch shop .